DIY: Eliminating an Outdoor Faucet
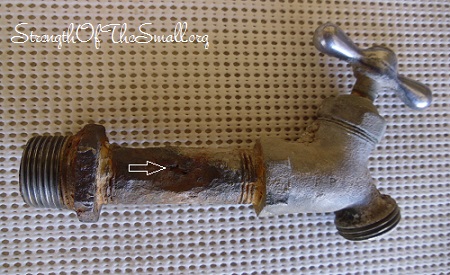
One of my outdoor faucet pipes has been leaking for a couple of months now from last Winters frost. It wasn’t so much a leak, but a couple of drops per every 5 hours or so every now and then from the rusted pipe, not the spigot. It turns out that whoever installed the faucet thirty-eight years ago decided to use a smaller pipe rather than a regular 3/4 inch spigot and because of that the smaller pipe started to get rust which ate thru the outer layers and slowly started to allow water to sweat out.

First things first, I made sure I had all my tools and supplies on hand. I had everything except for the Galvanized Plug Fitting which I bought from Lowes.
Materials/Tools Needed:
- Pipe wrenches (various sizes)
- Teflon Tape
- Mueller Proline 3/4-in Dia Galvanized Plug Fitting
- Additional tools may be required depending on the type of faucet/tap you have.
Step by step:
- I turned off the water to the whole house from the street.
- Using a pipe wrench, I twisted the pipe off where the bigger pipe was adapted onto the smaller pipe which luckily, didn’t break.
- Using a brush, I cleaned the interior of the pipe and I also cleaned off any rust or debris on the threaded fittings on the wall pipe.
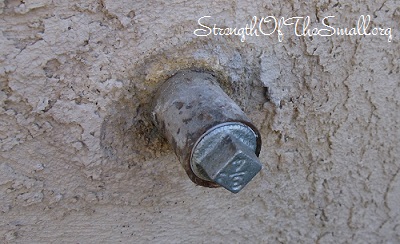
- I wrapped a few layers of Teflon Tape around the threads of the galvanized plug (this is very important as it ensures that no water leaks out).
- I screwed the new galvanized plug onto the pipe by hand until it tightened and then used the appropriate wrench to tighten the fitting real tight.
- I turned the water back on and checked that there was no leak.

For added precautions, I also picked up insulation for my other outdoor faucets to protect them from the Winter freeze. I am glad that everything worked for the best as this brings peace of mind.
