Upcycling & Recycling

DIY: Primitive Garden Sign

EPEngineer By EPEngineer2 min read734 views

By now some of you must have noticed our fondness for Primitive Decor. I love the simplicity and uniqueness of Primitive pieces. I love how charming a space looks and feels when all the right pieces come together. Our Backyard holds a lot of handmade Primitive pieces, all of which I build myself.

In April we made a Garden Sign after gathering all the necessary materials.
The Piece of plank I used was from an old wood platform on which a metal storage shed stood. It was already broken when we found it while dismantling the shed. I knew it would someday come handy and I set it aside.

Materials/Tools Needed Step by step
  • Wood Chop Saw
  • Scrap/Reclaimed Wood
  • Nails/screws
  • Drill, Drill-bits
  • Letter Stencils
  • Spray Paint
  • Mini Garden Tool
  • Swing Hook Kit
  • Decide on the size of your Sign
  • Measure and cut your wood
  • Using your stencils, spray paint your message on the wood
  • Place your Fork on the wood and drill two holes on each side of the Fork
  • Loop a wire or cable/zip tie around it to secure the Fork
  • Pre-drill and insert the hooks into the woods top frame
  • Attach hooks to the hanging location and hang your sign
Primitive Garden Sign.
‘Primitive Charm’ Garden Sign.

For this project, I used Permatex® Copper Spray-A-Gasket® Hi Temp Adhesive Sealant for the letters. The main reason was that regular paint/spray paint was getting absorbed by the wood. It turned out that Copper Spray-A-Gasket fills minor surface irregularities, hot spots, surface imperfections, can withstand high temperatures and resist fluids which in this case was perfect for my outdoors sign.

After building the Sign, we found a Vintage Hand Fork while visiting Linda Marie’s Enchanted Treasures. The Vintage Garden Hand Fork is entirely made of metal. The Fork originally had a weathered yellow patina color as well as some wear and surface rust. To preserve its rustic feel, I sanded it a little, applied some clear coat on it for a shinning finish and to protect it from the elements. I think it complements the sign beautifully.
Flower Bed Garden Edging

JM Perez By JM Perez2 min read801 views

When it comes to garden edging the possibilities are endless to meet your needs. You can choose from Plastic, Bricks, Rocks, Boulders, Bamboo, Wrought Iron/Metal, Bottles, Wood, Plates to Concrete and so much more.

Those with limited to no budget can look around their property for garden edging ideas. Do you have scrap wood, dead branches, pine cones, rocks or decorative bricks lying around in your yard? If you do, by all means put them to use. Those of us with trees of all types around our properties know that Nature has a way of stressing them to the breaking point such as:

» The weight of ice and snow
» Strong winds
» Dead branches
» Lack of nutrients
» Old age
» Plant disease (fungal infections), … etc!

What can we do with a fallen branch or a broken tree? For one, we can safely remove the fallen branch and dispose of it and/or contact an arborist to remove the fallen tree. We can use the wood for your fireplace, fire pit, as borders in your garden, and so much more.

The 2008 winter storm was so severe that it split two of my mature trees in two.
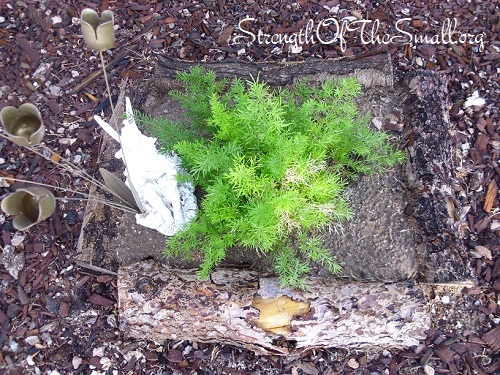
After removing and disposing of most of the branches, I kept a few branches from my broken pine tree which I am now using as plant borders.

Pine Wood Log as Plant border.

Our preferred garden edgings are the  Plastic edging  and Terrace Board Landscape edging.

Black Plastic Edging as Plant border.
Terrace Board Landscape Edging as Plant border.

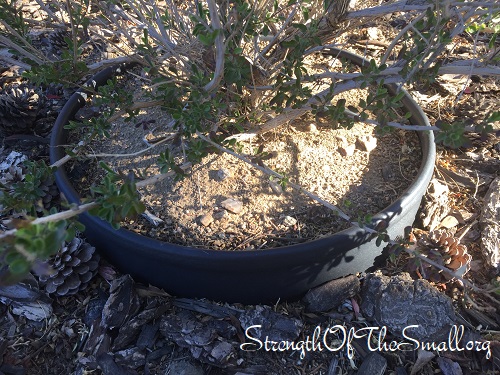
I have used pine cones as plant borders for a few years now and I have placed a lot around my plants and garden beds to deter squirrel from digging. So far, it has worked for me.

Happy Gardening and wishing you a good start into the week.

A Drive Down Memory Lane

EPEngineer By EPEngineer2 min read771 views

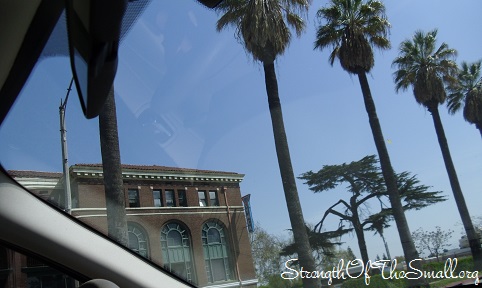
Yesterday being a warm day, we all agreed to drive down to Pomona, CA primarily for sightseeing and some vintage finds. On our way to our destination, we drove past places which meant so much to us.

Almost six years ago, my Son was born at this wonderful Hospital.

Pomona Valley Hospital Medical Center.

I spent the first three years of my Life, after High School, at the YMCA while attending college. The two last top windows on the picture used to be the room I occupied during my stay there.

YMCA Pomona, CA.
YMCA Pomona, CA.

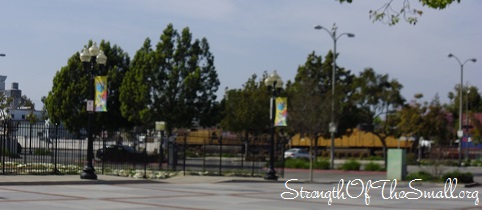
The Metrolink Train Station with other connecting transits such as the Omnitrans, Foothill Transit and the Metrolink Connect Shuttle. This being a block away from the YMCA made every destination available to me.

Train Station. Downtown Pomona, CA.

Some of the breathtaking beauties you find in Downtown Pomona, CA. This is on 2nd street which is about 2 blocks away from the YMCA.

Wall Murals. Downtown Pomona, CA.

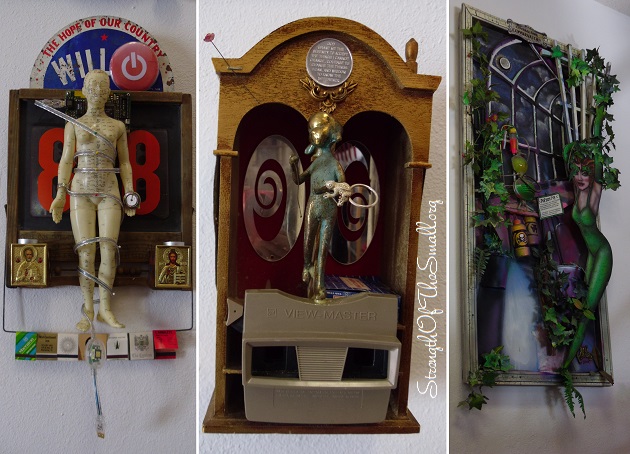
The beautiful art work below is from La Bomba Vintage Shop. This was my second time visiting the shop since we moved out of Pomona, CA six years ago. The shop like everything else in the city has evolved and each visit brings in new discoveries like the following art creations there.

La Bomba Vintage. Pomona, CA.

At times I find that a walk thru memory lane brings in new memories and allows us to enjoy part of our past. This places have always brought me enjoyment and wonder and as they change and the area evolves I will be vigilant to the changes and keep the memories fresh in my heart and mind. I hope that you all have favorite places that bring you and your family joy.

Horseshoe Art & Yard Sculptures

EPEngineer By EPEngineer2 min read1.2K views

This morning we took a trip to Lucerne Valley, CA mainly for sightseeing having taking this drive only twice before and coming across closed shops. Today everything was open and we got to take a look at the selections each stop had to offer.

Our first stop was at Pancho’s having stopped here before and seen their selection of Cement Sculptures/Statues and Water Fountains. They have their own molds and are very friendly. Their selections are either painted or unpainted giving you the option of how to proceed with your selection once purchased.
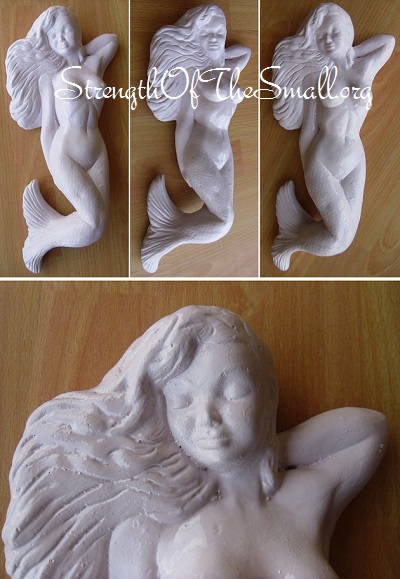
We decided on a 12 inch wall hanging mermaid decoration which was primed brown. After cleaning it and sanding a couple of spots, we painted it Soft Lavender. What a beautiful find!

Mermaid Sculpture.
Mermaid Sculpture.

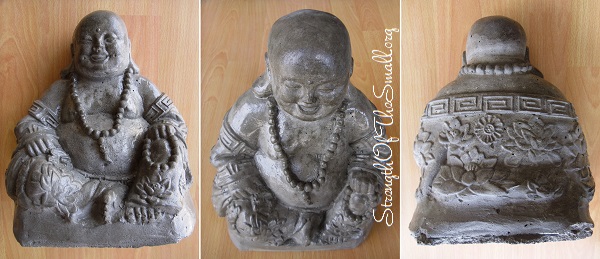
We also bought a cement smiling Buddha Statue which is very detailed and very friendly. We decided to keep it plain and only did a clear coat on it to protect it. It is a nice addition to our current Buddha collection and we hope that it will bring peace and tranquility to our garden and will be one of the focal points of interest.

Buddha Statue.
Buddha Statue.

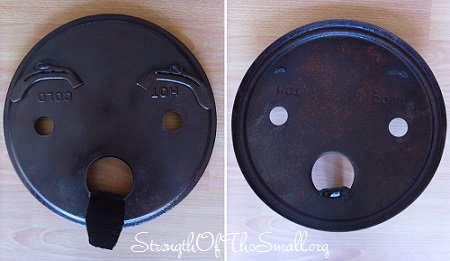
Our next stop was at a place down the road that offered a variety of metal sculptures, bottle art, antiques and horseshoe art made by Don Henry. Don is an artist who has been creating his own horseshoe art for years (flowers, kokopelli, butterflies, bird feeders and baths, bunnies, cowboys, plant stands and many others). His products are pure metal and will withstand the test of time. My wife fell in love with a rustic metal face made out of a cover from a model A cylinder cap and horseshoes and I just had to get it for her.

Rustic Metal Face.
Rustic Metal Face.

I hope that you will enjoy these places as much as we did. Every shop is an adventure in itself.

Address Location:
Horseshoe Art by Don Henry
32111 Hwy 18, Lucerne Valley, CA 92356
Phone: 1 (951) 634-9014

Hours of Operations:
Tuesday-Saturday 10:00 AM – 5:00 PM
Sunday: 10:00 AM – 4:00 PM

Click here to learn more about the City of Lucerne Valley, CA.

DIY: Uses of Laminate

EPEngineer By EPEngineer2 min read2.6K views

You bought Laminate for your Kitchen Counter tops and you have some left overs. What to do now that your project is complete? Do you get rid of your leftovers or save them for craft projects? When it comes to Laminates, the possibilities are endless. You could use your leftovers to build a play table for your kids, a garden table for your tools, an outdoor platform, a plant sand, an end table, a frame to hang your jewelry, Wall Art, Bookshelves, Cabinets, Coasters, create a Book Cover and so much more.

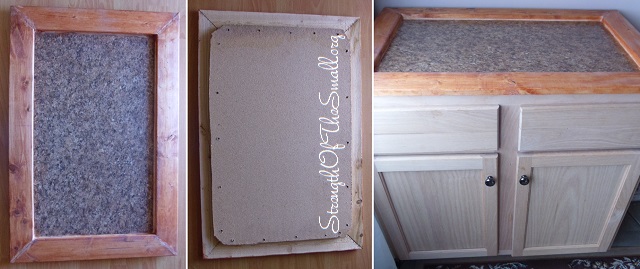
For our Kitchen renovation four years ago, we ended up with an extra base cabinet we couldn’t return and we had some leftover from the counter top. After almost a year of having both items sitting in the garage, we decided to build a custom counter top for the base cabinet and use as extra storage in the Patio.

Custom Countertop.
Custom Counter top.

Materials/Tools Needed:

  • Counter top piece
  • Wood (to build a frame)
  • Wood Screws, Power Drill, Drill Bits
  • Silicone Sealer (to seal the gaps)
  • Stain (for the Wood)
  • Heavy Duty Staple Gun and Staples

Step by step:

  • First step is to measure out the size of the piece that will be needed. I used a cutout from my counter top which came from the sink cutout. Since it was about 30 inches wide and the cabinet 34 inches, I used the wood to expand on all 4 sides.
  • Based on my dimensions I cutout the four pieces to make a frame leaving enough of a lip to be able to screw them onto the counter piece.
  • I used the staple gun to secure all four corners together, then used the Power Drill to screw the frame onto the counter piece.
  • I used the sealer to fill in the gaps on the frame and between the frame and counter piece. This will stop any liquids from seeping onto the wood cracks.
  • The wood stain was used last and will go over the whole frame. You can also use it on the counter piece to give it a darker look.
  • The last step is to secure the whole piece onto the cabinet being used and enjoy!

Checkout what others have accomplished using Laminate.

1. The Armadillo Chair. 2. Contemporary Wood Wall Light. 3. Bent Laminate Modular Form.

1. The Armadillo Chair. 2. Contemporary Wood Wall Light. 3. Bent Laminate Modular Form.

Love the Laminate/Wood Lampshade in the middle picture? You can make your own by clicking here and following the steps for this Wood Veneer Lampshade.

.