DIY: Projects

DIY: Shovel Door Handle

EPEngineer By EPEngineer2 min read1.7K views

This is one of the first projects I worked on when we first bought our House in 2007. The original gate latch fell apart and we needed to keep the gate closed at all times. It is a fun and simple projects to do. It is so easy to maneuver and latches every time you push the gate closed behind you.

Materials Needed:

  • Shovel, Pitchfork, Rake, Hoe, Harrow, Fishtail Hand Weeder (or any garden tool with a wooden handle)
  • Screws
  • Gate Latch
  • Cable Rope
  • Drill and a Drill Bit (to make the holes)
  • A Spring (for pulling the Shovel)

Step by step:

  • First step is to use the drill and drill bit to make a hole that will allow the cable rope to go from the latch to the opposite side of the fence. Try and make the hole slightly bigger than the cable wire diameter since it will need to move freely back and forth.
  • Attach the cable rope to the gate latch and run it thru the hole you have drilled. Now choose the area on the object you want to use as the handle and line it up to the cable rope. Make sure that when the object gets pulled, the cable rope will move the latch open and closed freely.
  • Use the screws to screw the object to the fence. Once it is fastened to the fence, use the spring to calculate how far the object will be off the fence. As you can see from the picture I decided to place the spring lower on the gardening shovel to have it sit at an angle.
  • Screw the spring to the fence and then to the object. Once done you are ready to attach the cable rope to the object and test it. After pulling on the handle it should pull the latch open. When you release the handle the spring will pull the handle back in place and the latch will go down far enough where pulling the gate close will latch it closed.

Wrenches can be used as door handle as well as other tools. All you have to do is use your imagination.
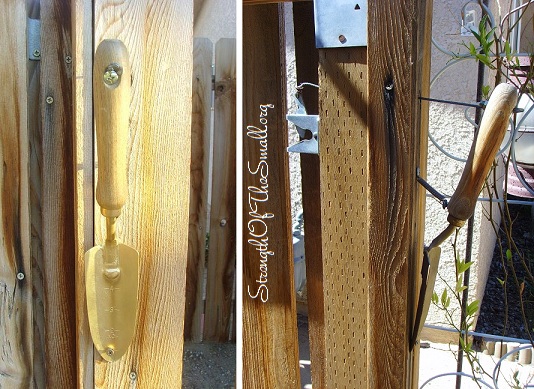
Shovel Door Handle.

Make sure you apply clear coat on the wood handle to give a clear and shinning finish and most importantly, to protect the wood from scrapes, the weather and also to help it last as long as possible.

DIY: Magazine Holder

JM Perez By JM Perez1 min read356 views

This year I have enjoyed some of the free items from some of my favorite companies. Some items I have signed up for myself and others I have received at no cost to me, like the Latina Magazine, a subscription given to me by a good Samaritan (thank you, whoever you are).

Materials Needed:

  • Handwoven Gift Basket
  • Spray Paint
  • Choice Fabric for Bow (hand tie a bow or use a glue gun)
  • Glue gun
  • Hot glue sticks
Magazine Holder.

Clean your Handwoven Gift Basket, spray paint it, hot glue or just hand tie a bow and you have a beautiful, eye-catching Holder to store your favorite Books, Magazines or whatever you wish.

“It’s in Giving that we Receive”

JM Perez By JM Perez3 min read545 views

One of the best things we truly enjoy to do in this Life is to give a little bit of our time to others. Sometimes we give too much and it’s fine too. We do not wait until someone calls for help to assist them; we offer to help. For instance, it breaks our hearts to see an elderly weeding or cutting down a tree. We know they are more than able to complete the task ahead of them; it’s just that ‘Compassionate Human Side’ of us which kicks in and urges us to act; to get up and reach out. Fighting it only makes it worse and leave us empty.

Most of the times, these individuals are reluctant to accept the help. When it comes to this, we barter for something (in our case that something never gets taken away). When at the end, they realized we tricked them, well, we all have a good laugh. We are always available to lend a hand and our help is always free. We strongly believe that helping someone should be free (of course, to some extend).

Last month after helping a neighbor remove the remainder of his tree stump, he surprised us with samples of beautiful Christmas Card collections and a gorgeous 2013 Boys Town Treasured Moments Wall Calendar. You see, he had to leave them in our mailbox because we politely made him understand that our help is free and he wanted to do something nice for us in return. That was quite a nice surprise and we thanked him.

Yesterday we had the opportunity to help out another neighbor clear the weeds in his front yard and organized his tools in the garage. I just got tired of seeing him sneezing and struggling to do the work himself. I cared less that he had a full house; I was more concerned about his allergies. He offered to pay which was a huge no-no for me, especially given the nature of the task. I said I would take a few branches of a Pine tree he had lying around (to use as plant border, see an example here). He agreed and we sealed the deal.
An hour later with a blistered finger, the job was complete. He was grateful and I was happy I could help.
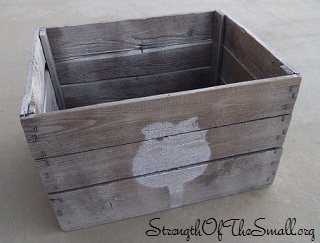
Prior to leaving, I spotted what turned out to be a Vintage Wood Crate in his garage. As I began to inquire about the little treasure, he started moving his tools from the crate into an empty box and handed the crate over to me. How cool was that? In my state of gratitude I managed to let out a sincere thank you. The thing is, I have always wanted to own a Vintage Wood Crate and — oh, I still couldn’t believe that I was getting one.

Vintage Wooden Fruit and Vegetable Crate.

Here’s the slightly new and improved Vintage Wood Crate, serving now as storage for our Giveaways goodies. I cleaned it up, did a little sanding here and there and spray painted it. I used Brushed Metallic Satin Spray Paint Nickel for the crate and Brushed Metallic Satin Spray Paint Sparkling Canyon for the Tulip.

I was blessed to receive all these beautiful things because I gave of my time to assist someone else, freely.

Click here to learn about cleaning Wooden Antiques.

DIY: Mummy Pumpkin

EPEngineer By EPEngineer1 min read603 views

After much deliberation on which craft to make, we decided to make a Mummy Pumpkin.

Materials Needed:

  • Pumpkin
  • First aid gauze/Toilet Paper/White duct Tape/White linen
  • Googly Eyes/Draw your own eyes
  • Black sticky back craft foam (for the mouth)
  • Scissors/ Crafts knife (to carve out the mouth)
  • Craft Glue/ Hot glue Gun (for the eyes)
  • Toilet Paper Roll/Vegetable can (for body, if desired)
  • Q-tips/Straws/Toothpick/ Wooden Skewers (for arms, if desired)

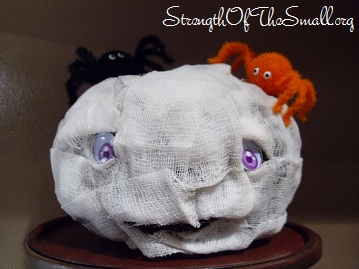
All we needed for our Mummy Pumpkin was a Grapevine Pumpkin, First aid gauze, and a pair of Googly eyes.

Mummy Pumpkin.

Step by step:

  1. Wrap the gauze around the pumpkin, leaving a few openings for the eyes and the mouth. Tuck the other end in. Some people glue one end of the gauze to the pumpkin as well as the other; I just wrapped away, loosely.
  2. Carefully place googly eyes

For a creepier effect you could use different eyes and red paint to randomly give it a bloody look.

DIY: LEGO Robot

JM Perez By JM Perez1 min read1.3K views

I am so in love with my children; they are both very smart and creative. When they are not reading, drawing, sight seeing and sometimes helping me garden; they spend their time building LEGO figures.

LEGO Robot.

After returning from school today, in very good spirit as usual, he surprised us with his creation, which he is very proud of. He’s built over figures in the past, which have evolved over time and which I will share as soon as I get a hold of the pictures.

Other Fun Creations:

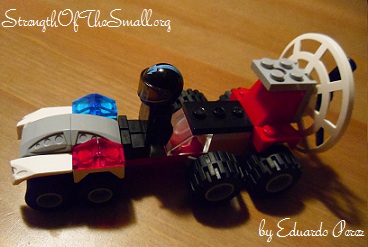
LEGO Racer.
LEGO Desert Racer.