DIY: Projects

Cooling Solutions for Hot Days

JM Perez By JM Perez3 min read1.2K views

Seven and a half weeks until Summer and temperatures are already soaring here in the High Desert. Not too long ago, some of us dreamed of trips to the Beach, Lake and Camping. Now we are wishing for the hot days to pass and looking for ways to make them enjoyable without missing out. For every problem, there’s a solution and you might want to start looking at Outdoor Cooling Systems for those BBQ nights you’ve been planning.

INDOOR COOLING SOLUTIONS

Turn On Your Air Conditioner

To lower the heat while filtering the air for better quality breathing and promoting wellness.

Open Your Window

During the evening, on a breezy day, open your window to enjoy some fresh air as long as you have screens to keep insects out as well as other particles and debris carried by the wind.

Eco Breeze

It’s Fresh Air cooling which lets you take advantage of two types of cooling.  Fresh air cooling uses Mother Nature’s cool air to remove heat during periods of low outdoor temperature and humidity.  If your home has air conditioning, it will automatically take over when the weather becomes hot and humid.

Exciting Windows! (If you’d rather stay indoors)

Custom draperies, blinds, shades or shutters for maximum light and energy control by combining soft, medium and hard window treatments. Smart window covering, window treatments as well as innovative and beautiful solutions to keep your home cool or warm using newly developed lighter materials or fabrics to give a beautiful feel and also to efficiently help in heat and cooling retention.

OUTDOOR COOLING SOLUTIONS

Use Your Pool

Click here for tips on getting it ready for Summer and the hot days. Click here to read about The Pros and Cons of Owning a Swimming Pool Home.

Evaporative “Swamp” Coolers

According to The Home Depot website, Evaporative coolers lower indoor temperatures by combining the natural cooling properties of evaporating water with an efficient air moving system. This combination of moisture and a steady breeze can lower indoor temperatures by as much as 30°F. Airflow is controlled by opening windows to allow the unit to push warm air outside. Evaporative coolers also add moisture, which helps keep fabrics and wood from drying out, and the water-filled pads act as a type of filter, removing dust and allergens from the air.
Evaporative coolers can be used as the sole cooling system, or to complement existing air conditioning systems. However, they should never be used at the same time, as one adds humidity while the other removes it. Evaporative coolers offer several benefits over air conditioning, including:

  • Low installation and maintenance costs
  • 75% less electricity usage
  • Powered by a standard 120 volt outlet
  • No ozone damaging refrigerants
  • Fresh air flow pushes out warm air, smoke and pollution
  • Breeze makes effective room temperature feel 4 to 6 degrees cooler

Evaporative coolers are most effective in areas of low humidity and hot temperatures. They are not effective in humid climates or during rainy seasons. They are not as controllable as air conditioners, and can use between 3.5 and 10 gallons of water per hour, a consideration for use in areas with limited water supplies. The degree of humidity they deliver is a feature that distinguishes the two basic types of evaporative coolers.
Click here for additional information.

Outdoor Ceiling Fans

These devices are designed for pretty much any space in a home and allow for cooling as well as providing lighting. They are appealing and come in a wide range of colors and gorgeous designs.
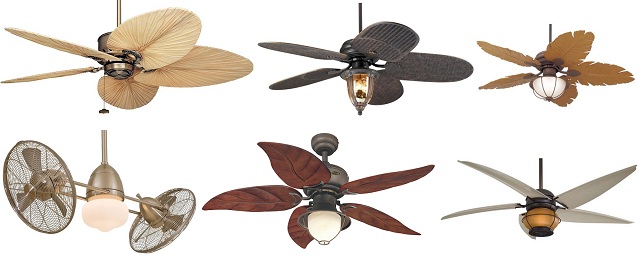
Outdoor Ceiling Fans.
Image Links: 1. 2. 3. 4. 5. 6.

Outdoor Cooling Shades

  • Extended Awnings
  • Gazebo Curtains
  • UV Rays protected Shade Sail
  • Roll up Sun Shade
  • Patio Umbrellas and Canopies

Portable Misting Systems
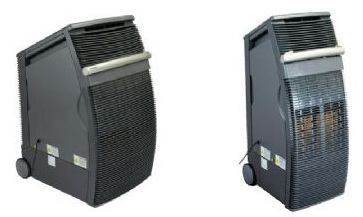
Outdoor Cooling Unit by Orionair.

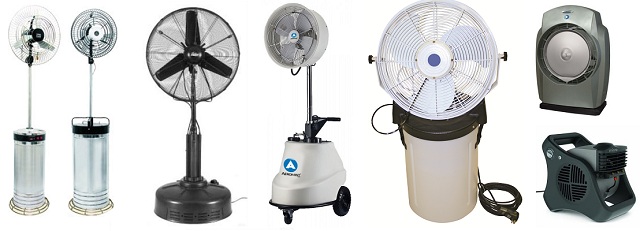
Portable Misting Fans

1&2. 3. 4. 5. 6. 7.
Image Links: 1&2. 3. 4. 5. 6. 7.

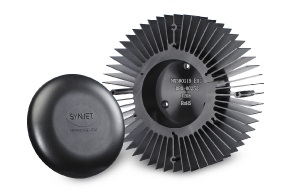
Outdoor LED Coolers

Outdoor LED Coolers by Nuventix.

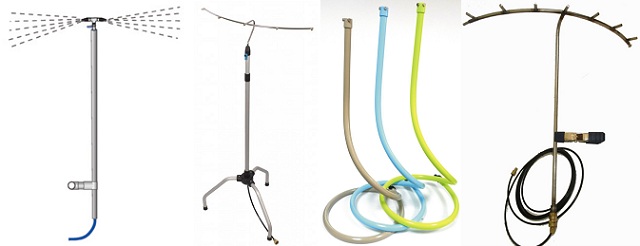
Misting Tower

Image Links: 1. 2. 3. 4.

Click here, here, here and here for some awesome Do-It-Yourself PVC Sprinkler ideas.

It’s Summer and it’s Hot:

  • Do not forget to drink plenty of Water to prevent dehydration.
  • If you must garden, chose between morning and evening hours.
  • Stay cool indoors/outdoors with air condition on to avoid heat exhaustion and heat stroke.
  • Wear lightweight and loose-fitting clothing.
  • Do not leave your children or pets in the car while you are away.

Click here to read about Hot Weather Survival Tips.
DIY: LEGO Creations

EPEngineer By EPEngineer1 min read1.2K views

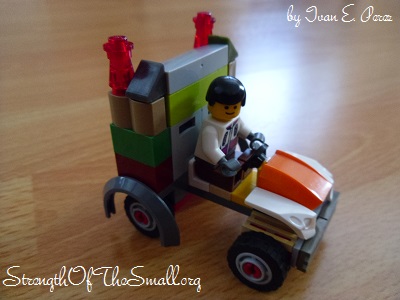
Today, after picking up my son from school and having lunch, I decided to pull out the huge box of mixed LEGOs that we had stored in his bedroom closet. Lately he wanted to build something that could carry items in it and he was able to build that today as you can see in the pictures below.

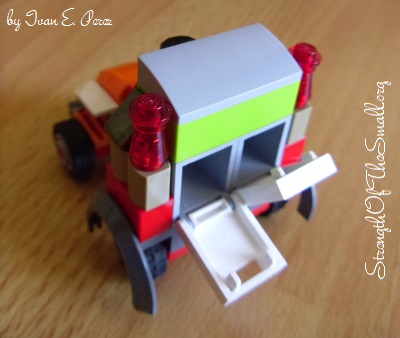
LEGO Mail Truck/Carrier.

The LEGO Mail Truck/Carrier has two boxes with lids which face back and can hold tiny LEGO pieces.

LEGO Mail Truck/Carrier.

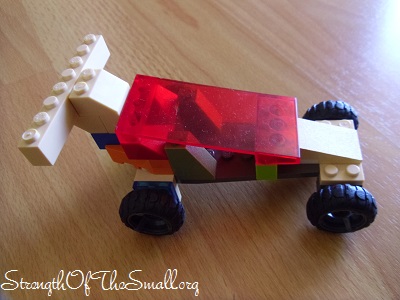
The next three creations are various desert racers. He was so proud of his creations that he has not modified them since making them.

LEGO Racer.
LEGO Racer.
LEGO Racer.
LEGO Racer.
LEGO Racer.
LEGO Racer.

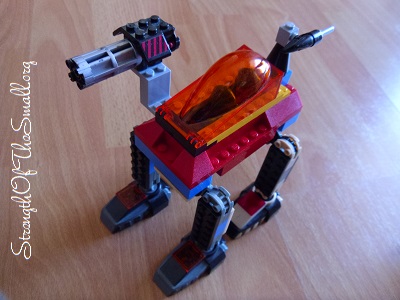
This two creations are made from spare parts that I had from previous LEGOs that I owned. He was thrilled when he saw them and like his own creations; has not modified them yet.

LEGO Walker.
LEGO Walker.
LEGO Desert Rider.
LEGO Desert Rider.

Vintage Wood Folding TV Tray

JM Perez By JM Perez2 min read1.1K views

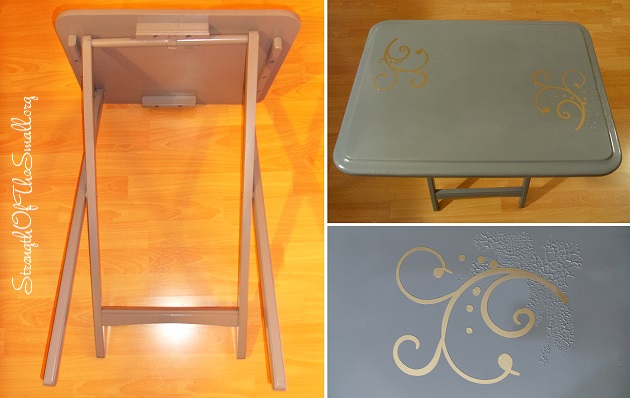
Last month, our wonderful neighbors across the street gave us a gorgeous 1970′s Vintage Sea Shell Hanging Planter along with a Vintage Wood Folding TV Tray. The folding tray originally had a mahogany color and Saturday being a warm day, we decided to paint a few items (re-purposing our vintage stainless steel metal tray for instance) and giving the folding tray a makeover. I am happy with the new color choice.

Vintage Wood Folding TV Tray.

We cleaned the tray with soap and water to get rid of any dirt so that the paint will latch on evenly. It had a couple of spots that needed a little tightening as well, to stop it from wiggling. The latching clamp was a little loose and had to be bent back into shape. After this, we sanded a couple of spots on it, cleaned it once again and let dry in the sun. After half an hour it was ready for the spray paint which I applied in layers to keep it from running.

After spray painting the wood a Satin Granite color (by Rust-Oleum) and affixing a stencil on to the top area, we proceeded to apply a clear coat on the surface to keep it nice and shiny as well as protecting the surface from the elements. An area around the stencil began bubbling, leaving some marks on the surface. Not knowing how to proceed and refusing to sand the area down, I decided to take it as it was. Now I actually find it quite lovely.

DIY: Vintage Chalkboard Tray

JM Perez By JM Perez2 min read575 views

What can you do when you own a gorgeous vintage piece that you either don’t use often or can’t use for its original intent? For one you could re-purposed the item to meet your needs.

Well, I have been wanting to make some chalkboard for my kitchen and I thought it would be great on a tray. At the same time, I was looking for a vintage metal tray and was lucky enough to find one out at the Estate Liquidators in Hesperia, CA. I instantly fell in love with this lovely Stainless Steel Vintage Tray with charming gold handles (to top it all of, it was brand new and still in its original packaging).  I knew at that moment that I had just found what I have been looking for: a plain and simple metal tray.

Vintage Chalkboard Tray.

Today, I finally decided to re-purposed my stainless steel vintage metal tray and it turned out great.

Materials/Tools Needed:

  • Metal Serving Tray
  • Chalkboard Paint/Spray Paint
  • Paintbrush/Sponge brush (if you’re using Paint and not Spray Paint)
  • Painter’s Tape (if you’re not planning to paint the whole tray)
  • Vinegar (to prevent the paint from chipping)

How to proceed:

  1. Clean/sand your tray (if needed).
  2. Clean the area you need painted with vinegar to insure that your paint doesn’t chip.
  3. Tape the borders (if you’re not planning on painting the whole tray).
  4. Start painting in a well ventilated area and let it try at least one hour.
  5. When you’re done and satisfied, remove the tape around the borders.

Now that your chalkboard tray is complete, you can write/draw on it and display it in your favorite place with pride. I hope you enjoy yours as much as I am enjoying mine.

DIY: LEGO Snowmobile

JM Perez By JM Perez1 min read1.1K views

Living in the High Desert can sometimes be challenging even more so for those of us with children.
My kids are super active and can’t stand not having something to do indoors. They love outdoors activities above all else and when given an opportunity, they suit up like real explorers ready for new discoveries. They don’t like dreadful weather and I don’t either.

The weather has been really bad these past few days. It is cold outside and we are having severe, gusty winds, blowing sand and dust as well as reducing driver visibility at times making driving difficult and even potentially hazardous. Last week I found pieces of cardboard lying in my backyard as well as plastic bags blown by the wind.  I have found a few broken branches here and there, but nothing major.

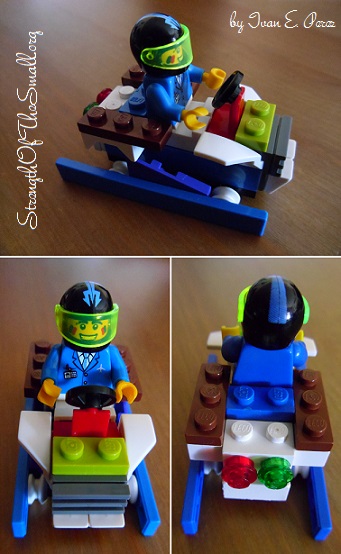
Today, after completing his homework, my awesome little boy pulled out his box of LEGOs and started building. He has such a creative mind and I am always amazed at his creations. After helping his sister build a few things, he decided to build a few cars and trucks for himself, among them this LEGO Snowmobile below.

LEGO Snowmobile.
LEGO Snowmobile.

The wind is still howling outside, we had a good day and I hope tomorrow will be even better.