DIY: Projects

DIY: Nautical Wooden Anchor

EPEngineer By EPEngineer1 min read2.2K views

Last year while visiting the shops up in Crestline, CA; we decided to check one more shop before driving back home. So, we stopped at the  Crest Forest Senior Citizens Thrift Shop (this little thrift shop has two levels and both are full of beautiful items. From books to household items and electronics, they have it all). While I took the kids to look at some books, my wife stayed behind and picked out a few things, including a Nautical Wooden Decorative Anchor. The Anchor was primed and came with a rope.
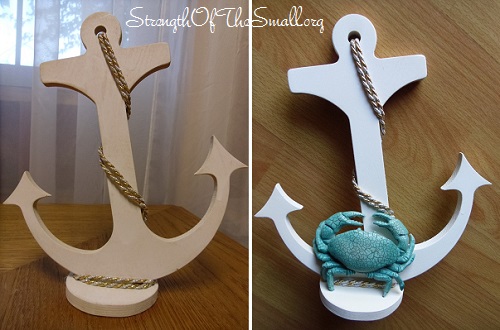
Nautical Wooden Decorative Anchor.

Materials/Tools Needed:

  • Wooden Anchor
  • Nylon rope
  • Glue gun
  • Hot glue sticks
  • Power Drill and Drill Bits (to make a hole)
  • Spay Paint
  • A Crab or a decorative piece of your choice

Step by step:

  • Use your Power Drill to make a hole on the Anchor (if needed)
  • Clean the wooden Anchor if needed
  • Spray paint
  • Secure the Anchor rope by inserting one end of the rope through the hole and hot gluing it. Then loop the rope around the Anchor and hot glue it at the base.
  • Hot glue the crab unto the base

Now that you’re done, place your Nautical Wooden Anchor somewhere you can see and admire it.
DIY: Primitive Slingshot

EPEngineer By EPEngineer1 min read2.1K views

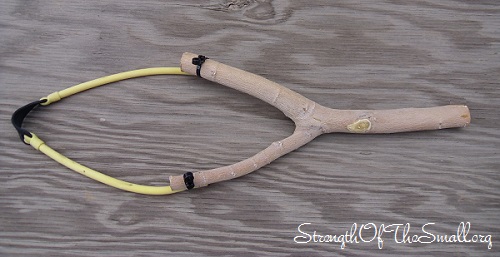
I finally put together the Primitive Slingshot which I started working on almost half a year ago. I was hoping to find a perfect Y-shaped tree branch before putting it together. However, our encounter with some Squirrels lately have triggered the need to have some sort of device available to handle the issue.

Materials/Tools Needed:

  • A Y-shaped tree branch, Drumsticks
  • Saw (to cut down the branch)
  • Knife (to carve notches on a branch)
  • Awl (to punch holes toward the ends of the Nylon Webbing or the Leather Strip)
  • Paperclip (thread the rubber band through the holes)
  • Piece of Leather strip, Nylon Webbing
  • Rubber band, Latex Surgical Tubing
  • Dental floss or Zip Ties(to fasten the Tubing)

Step by step:

  • For this project I decided to use the surgical tubing, leather strip, Y-shaped tree branch and two zip ties. First I used the leather strip and cut a hole on each side to loop the surgical tubing thru it. Once that was done, I proceeded to prepare the y shaped branch by removing any bumps from the handle.
  • Now I used the zip ties to fasten each surgical end to each post of the Y-shaped branch; making sure it’s nice and tight so that it does not come loose and cause any injuries.
  • Test out the sling shot for functionality and make sure that no adjustments are needed.
Primitive Slingshot.

Now that this Slingshot is operational, I am hoping to scare a couple of Squirrels away.

DIY: LEGO BoyBot

Kashiro By Kashiro1 min read493 views

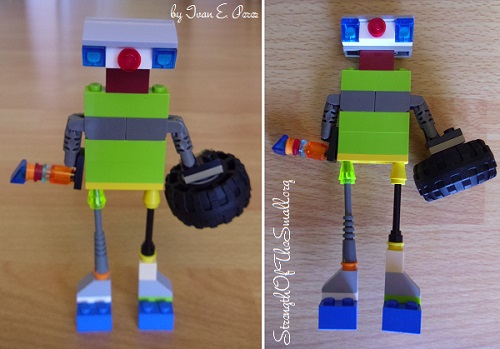
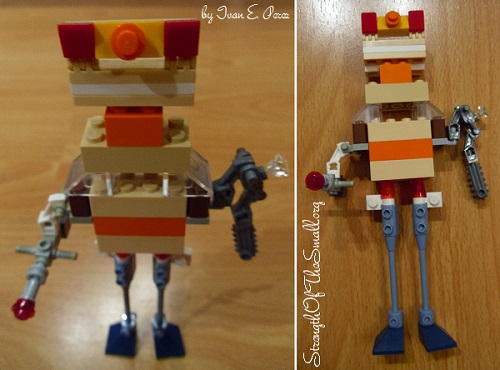
School has been out for Summer vacation since last Thursday and I am busy working on my LEGO creations. Today I build a LEGO BoyBot (Boy Robot). I was playing with a house I build last night when I decided to use some of the extra pieces from the house to build a Boy Robot for myself and a Girl Robot for my little sister.

LEGO BoyBot.
LEGO BoyBot.
LEGO GirlBot.
LEGO GirlBot.

I like it very much and I think it turned out great. The best thing about this creation was the expression on my parents faces when they saw it for the first time. Like my Mom would say, priceless!

Until next time, have a good day.

Nerd Day at School

JM Perez By JM Perez1 min read914 views

The week of May 13th through May 17th, is the start of Spirit Week at my Son’s school. Today was Nerd Day.

We had such a wonderful weekend at home, celebrating Mother’s Day weekend and doing all the fun things we enjoy that we completely forgot to stop by Party City to buy a pair of nerd glasses for my son. We saved the day by quickly remembering that both my husband and me sported huge prescription glasses once upon a time. After locating the glasses, my husband decided to use one of his and modify it to fit our son’s little face perfectly (and oh, boy! The little dude was thrilled. He wanted a mohawk hairstyle, but his hair was just too curly).

Nerd Glasses.
Nerd Glasses.
Materials/Tools Needed Step by step
  • A Pair of Nerd Glasses
  • Tiny Screwdriver
  • Pliers
  • Spray Paint
  • Use a tiny screwdriver to open the frame and remove the lenses
  • For smaller kids, use some Pliers to bend the temple tips
    (so it wraps behind the ears)
  • Adjust the nose pads so they don’t scrape the nose bridge
  • Spray paint and let it dry

With approximately three more weeks to go until Summer vacations, my kindergartener is so excited about the fun activities his teacher has organized for them. It’s going to be a fun-filled week with lots of laughter and cheers and I am looking forward to making these moments memorable and lifting up his spirit.

Charming Primitive Wood Planter

JM Perez By JM Perez2 min read584 views

Yesterday we took a trip to Lowe’s. I have noticed that close to the end of each Season, the store offers a very limited quantity of selected plants. Last Fall I missed out on a plant which I really liked by promising to return the following days and to this date, that particular plant hasn’t made a comeback. Today, when I spotted a Cytisus San Francisco Red Broom Plant, I quickly picked one of the only four in stock.

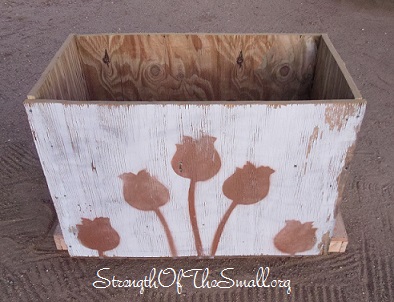
Where to plant this beauty, I asked myself. We looked at a huge variety of planters and I still couldn’t find one that would compliment this plant. I turned to my very handy husband and kindly asked if he could build a planter for me and he said yes. He built it using pieces of scrap and reclaimed woods we found laying against our storage shed when we bought our Home. The wood below was already painted white, all we did was used a wire brush and scraper to scratch and remove some of the paint which was chipping off. By doing that we ended up creating an old distressed finish and then we used a home-made stencil to spray paint the silhouettes of the Tulips bellow. Simply charming and it turned out better than I expected.

Primitive Planter.
Primitive Wood Planter.
Materials/Tools Needed Step by step
  • Wood Chop Saw
  • Lumber/Scrap Wood/Reclaimed Wood
  • Nails/screws
  • Hammer/Drill, Drill-bits
  • Decide on the size of your planter
  • Measure and cut your pieces
  • Assemble the pieces

This morning I filled up my planter with clean plane dirt and potting mix before setting the plant in. We all like it very much and they both make a lovely combination. I am grateful for a good find, a very handy husband, for my family as well as our priceless time together and for the ability to appreciate little things.

I hope our little projects inspire creativity for your gardening plans.